2021年08月18日
フェイスペインティング
スキンがある程度編集出来るようになりましたが、顔全体を作るのはちょと難しすぎです;;
なので、フェイスペインティングに挑戦しました。これはタトゥと同じことですね。
It became somewhat possible to edit skin, but it is too hard for me to create whole face. So, I challenged the face painting, which is the same way for tattoo.

スキンの編集と同様、スキンテクスのどの場所がアバターのどこになるかを見る必要があります。
これはリンデンのテンプレートで、アバター上の位置と参照できるよう色を付けました。番号を付けてもいいです。
As same as the skin editing, it is necessary to know what area is transferred on actual avatar. This is the template prepared by Linden, which I put some color for reference to avatar face. Numbering the mesh could be OK.

上のリンデンのテンプレートは顔を作るためなので、鼻や瞼の周りが細かくメッシュされています。
3: ペインティングには不便なので、グリッドを別に作りました。フォトショップでスキンとは別レイヤーで作ると便利です。
4: 3をそのままテクスにしてアバターに貼りつけました。これは後で使います。
The above template might be for creating face, so the area around nose and eyes are meshed in detail. This is not suitable for painting.
3: I made another one with grid. The grid should be put on a separate layer.
4: A skin was made with the skin and grid together, and put on an avatar like 4 that will be used later.

5: フォトショップのブラシツール等でペイントします。ベースの顔はグリッドを装着した絵4と同じアングルで撮ったものを使います。
なるべくグリッドが歪まないアングルだと後が楽です。お絵かきは別レイヤーで行います。RLの写真や他で書いた絵を貼ってもOKです。
1は国旗を貼り付けました。顔の上で左右対称なら半分だけ書けばいいです。
6: 4と5を重ねて、透明度を調整し、両方が見えるようにします。これが位置調整の参照画像になります。
5: Firstly, make a painting with Photoshop on a picture of avatar, which should be taken with the same angle as 4 that has the grid. The angle is preferable to show the grid as less distortion as possible. The painting should be done on a separate layer. Photographs of real things can be used. In the 1 I used a flag picture. If the image is symmetrical, it is necessary to paint only half of it.
6: The 4 and 5 should be doubled, then adjust the transparency to show both of them. This will be the reference picture to adjust the painting layer.

7: 5で作ったレイヤーをスキンのグリッド3に貼りつます。これも別レイヤーのままにしておきます。
別レイヤーを移動変形し、6の絵のグリッドとの相対位置が同じになるようにします。決まったら左右反転させて反対側を作ります。
8: グリッドレイヤーを消します。ここで最後に細部と色に調整を加え、実際にアバターに装着して確認します。
お絵かきは別レイヤーのままにしておけば何度でも変更や調整が可能です。慣れたら最初から8を掻いてもOKです。
7: Take a copy of the painted layer made in 5 and paste it on the skin grid 3 as another layer. Then adjust the size and distortion of the layer to have the same relation as the grid on 6. After getting the adjustment, make a symmetrical copy for the other side.
8: Erase the grid layer. Finally. the detail and color will be adjusted at this stage. Put it on the avatar to check the position. The painted layer should be kept as a separate layer that can be modified anytime. It could be possible to start with painting directly on 8.

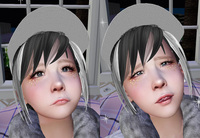
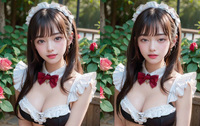
一応記念写真を。私はフェイスペインティングもタトゥもあまり興味がないので、面白かったですけど実用には^―^
いつもの馬場集会所はダンスだったから見えないとしても、バーで座ってて7人もいて、誰も話題にしてくれなかった;;
Took pictures for the record. Personally, I care for neither face painting nor tattoo, so it was interesting but not practical. ^-^ I wore it at the Baba Meeting Area but no one noticed it. It could be natural since we were dancing, but while sitting at another bar, none of seven guests mentioned about my face.;;

テンポラリーアップロードを使えば検討中の10リンデンドルは節約できます。
でもめんどいので、オフラインで3次元で確認が出来るツールがあるそうです。
前回同様ここにアップしたスキン、テンプレート、グリッドなどはそのままコピーしてアバターに使えます。
You can save L$10 while checking by using temporary upload, but there might be some tool that makes it possible to check it off-line. As before, the skin, template, or grid shown above can be used on avatars by copying them.
なので、フェイスペインティングに挑戦しました。これはタトゥと同じことですね。
It became somewhat possible to edit skin, but it is too hard for me to create whole face. So, I challenged the face painting, which is the same way for tattoo.

スキンの編集と同様、スキンテクスのどの場所がアバターのどこになるかを見る必要があります。
これはリンデンのテンプレートで、アバター上の位置と参照できるよう色を付けました。番号を付けてもいいです。
As same as the skin editing, it is necessary to know what area is transferred on actual avatar. This is the template prepared by Linden, which I put some color for reference to avatar face. Numbering the mesh could be OK.

上のリンデンのテンプレートは顔を作るためなので、鼻や瞼の周りが細かくメッシュされています。
3: ペインティングには不便なので、グリッドを別に作りました。フォトショップでスキンとは別レイヤーで作ると便利です。
4: 3をそのままテクスにしてアバターに貼りつけました。これは後で使います。
The above template might be for creating face, so the area around nose and eyes are meshed in detail. This is not suitable for painting.
3: I made another one with grid. The grid should be put on a separate layer.
4: A skin was made with the skin and grid together, and put on an avatar like 4 that will be used later.

5: フォトショップのブラシツール等でペイントします。ベースの顔はグリッドを装着した絵4と同じアングルで撮ったものを使います。
なるべくグリッドが歪まないアングルだと後が楽です。お絵かきは別レイヤーで行います。RLの写真や他で書いた絵を貼ってもOKです。
1は国旗を貼り付けました。顔の上で左右対称なら半分だけ書けばいいです。
6: 4と5を重ねて、透明度を調整し、両方が見えるようにします。これが位置調整の参照画像になります。
5: Firstly, make a painting with Photoshop on a picture of avatar, which should be taken with the same angle as 4 that has the grid. The angle is preferable to show the grid as less distortion as possible. The painting should be done on a separate layer. Photographs of real things can be used. In the 1 I used a flag picture. If the image is symmetrical, it is necessary to paint only half of it.
6: The 4 and 5 should be doubled, then adjust the transparency to show both of them. This will be the reference picture to adjust the painting layer.

7: 5で作ったレイヤーをスキンのグリッド3に貼りつます。これも別レイヤーのままにしておきます。
別レイヤーを移動変形し、6の絵のグリッドとの相対位置が同じになるようにします。決まったら左右反転させて反対側を作ります。
8: グリッドレイヤーを消します。ここで最後に細部と色に調整を加え、実際にアバターに装着して確認します。
お絵かきは別レイヤーのままにしておけば何度でも変更や調整が可能です。慣れたら最初から8を掻いてもOKです。
7: Take a copy of the painted layer made in 5 and paste it on the skin grid 3 as another layer. Then adjust the size and distortion of the layer to have the same relation as the grid on 6. After getting the adjustment, make a symmetrical copy for the other side.
8: Erase the grid layer. Finally. the detail and color will be adjusted at this stage. Put it on the avatar to check the position. The painted layer should be kept as a separate layer that can be modified anytime. It could be possible to start with painting directly on 8.

一応記念写真を。私はフェイスペインティングもタトゥもあまり興味がないので、面白かったですけど実用には^―^
いつもの馬場集会所はダンスだったから見えないとしても、バーで座ってて7人もいて、誰も話題にしてくれなかった;;
Took pictures for the record. Personally, I care for neither face painting nor tattoo, so it was interesting but not practical. ^-^ I wore it at the Baba Meeting Area but no one noticed it. It could be natural since we were dancing, but while sitting at another bar, none of seven guests mentioned about my face.;;

テンポラリーアップロードを使えば検討中の10リンデンドルは節約できます。
でもめんどいので、オフラインで3次元で確認が出来るツールがあるそうです。
前回同様ここにアップしたスキン、テンプレート、グリッドなどはそのままコピーしてアバターに使えます。
You can save L$10 while checking by using temporary upload, but there might be some tool that makes it possible to check it off-line. As before, the skin, template, or grid shown above can be used on avatars by copying them.
Posted by Temi at 06:05│Comments(0)
│顔


